Hey Love Birds…
So tomorrow is Valentines Day. Valentines Day falls on a Thursday this year. This is an issue for two main reasons:
1. You probably have to get up and go to work on Friday which means you (may) have to limit your Prosecco intake
…and
2. You probably have to be at work on Thursday too (why is it not a bank holiday!?), which seriously eats into your ‘looking absolutely beautiful in time for a romantic valentines dinner, ready to get picked up at 7pm even though you only got in at 5:45pm’ time scale!
Prep is key, especially when you know that you want to look good but time is limited . Wash, blow dry and straighten your hair the night before hand and you’ll save lots of time (well, you’ll have more time to decide between your six new outfit choices at the very least).
Fear not, one thing you won’t need to worry about is your hair. I’ve devised three super easy hair styles that can all be completed in just five steps and all take less than five minutes each. The biggest issue will be deciding which one to go for!
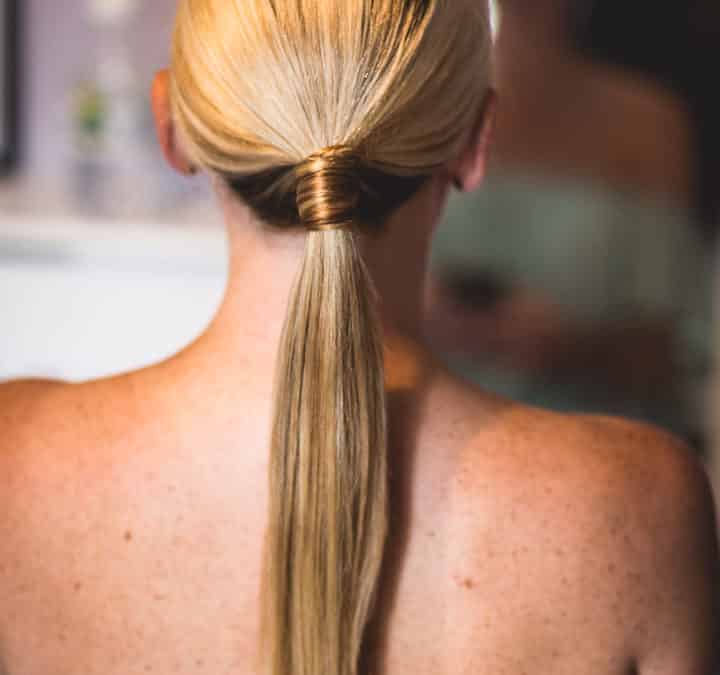
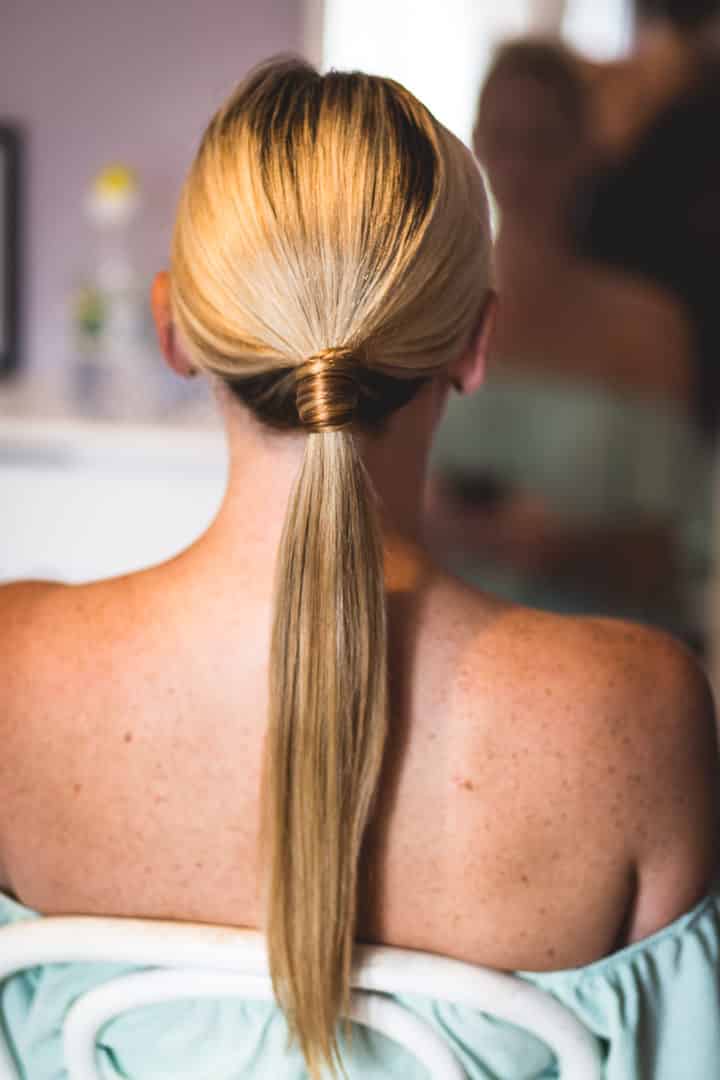
Date Night Hairstyle Style No. 1
‘The stylish and chic ponytail’
This is the way to say ‘I’m low maintenance (kinda!) but I have style, class and I know what looks good‘.
Step1: Gather your hair into a low ponytail at the nape of your neck and secure with an elastic
Step2: Use a styling product to tame any flyway hair and add that extra bit of smoothness and shine. I love Goldwell StyleSign Creative Texture Unlimitor. Available from Capital Hair and Beauty. It gives just the right amount of hold with that little bit of extra added shine.
Step3: Take a small section from the ponytail from the bottom/underside of the elastic and re apply the spray wax to this section only. Use enough product that you find the hair starts to cling together and be sure to run in through right to the ends.
Step 4: Wind the hair from the small section you have removed from the ponytail around the elastic that you are using to secure the hair. Dependent on your hair length you might find this goes round just a couple of times or maybe even several. Once you have used all of the hair, tuck the end into the section that now covers the elastic. You might want to use a hair grip to secure this but be sure to tuck this into the ponytail so its hidden from view.
Step 5: Finish the look by adding a shine spray, I love Bed Head Headrush Shine Spray (which has the added bonus of smelling amazing too!) and running some serum through the length of your hair to keep it sleek. Add a light spritz of hairspray (I use Kenra 25 for a strong hold so I know it’s not going anywhere!) and you’re good to go!

Date Night Hairstyle Style No. 2
‘All Tied Up’
I love this easy chignon. It’s on trend, cute and fashionable and especially easy if you’re in a rush but still want to make a statement.
Step 1: Pull your hair into a low ponytail at the nape of your neck and secure with an elastic.
Step 2: Select your scarf/ribbon/fabric of choice and find the middle. Tie this around your elastic so equal lengths remain either side.
Step 3: Separate your hair into three strands so you can begin to plait. Use a light spray of texture spray or dry shampoo. I love Batiste Dry Shampoo (it’s not only for greasy hair you know!). Add one side of your remaining scarf to the left side of your three strands, and add the other the right side. The only section not containing fabric will be the middle section.
Step 4: Braid the hair into a basic three strand plait. Your chosen accessory will become woven amongst the hair and look like part of the plait. When you reach the bottom secure with an elastic.
Step 5: Holding the bottom of your braid, wind the hair up onto your head and around the elastic at the bottom of your neck. Secure into place with hair grips. Voila!
Date Night Hairstyle Style No. 3
‘Braided Beauty’
This hair screams ‘I have style and character and I’m not afraid to stand out from the crowd’. Although it looks intricate, its easily done with a simple French braid.
Step 1: Section off the top of the hair from the hairline above the mid point of your eyebrows backward in a triangle movement until you find yourself half way back across the top section of your head. Secure this with a clip so it stays separate from the rest of the hair.
Step 2: Gather the rest of the hair into a ponytail in line with your ears. This is generally around half way up the head. Secure this with an elastic at the central point of your head. At this point I add my Kenra 25 Strong Hold Hairspray to secure and flyaways and ensure that the ponytail is solid and secure.
Step 3: Release the front section of hair, add some texture spray or dry shampoo. This time I used Goldwell StyleSign Creative Texture Texturizer to add body, and starting nearest to your hair line, begin to French braid following the direction of your hair. If you can’t French braid then a simple plait will also give the same effect although you may find that you need to use a smaller section closer to the front of your hair. Once you reach the end of the hair secure with an elastic.
Step 4: Spray the braid with a texture spray and gently start to pull each section , starting with the bottom to loosen the braid. This technique is known as ‘pancaking’ and will ensure that the braid is wider, larger, bigger and sits flatter to your head .
Step 5: If needed you can use a hair grip to secure the underneath of the braid at the point just above the hair elastic that is holding your ponytail, but please do be sure to push the grip into the hair – you don’t want to ruin the effect of the style with any visible pins. Finish with another spritz of Kenra 25 Hairspray to secure and tame any flyaways.

Hope this helps, told you it was easy!
So easy in fact that you can almost sneak off to the ‘ladies room’ on work time to get it done before you run out the door as you’re counting down to home time (but if anyone asks then I didn’t even suggest that!).
Please do like, share and if you want any more inspiration have a look here at the GALLERY pages.
Happy Valentines Day everyone!
Katie x